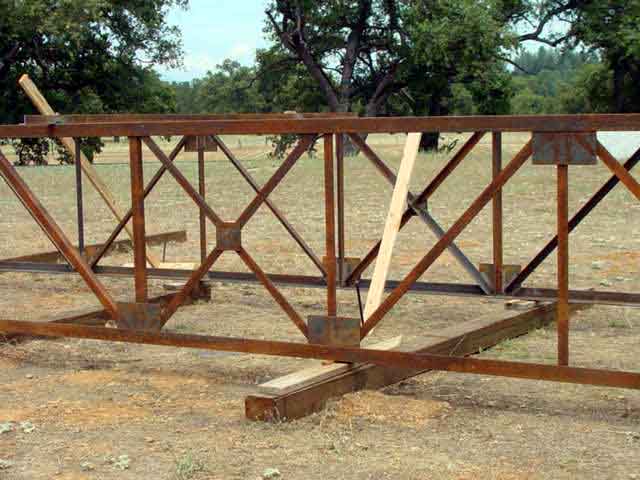
68.5 Feet Long & 8 Feet Wide Sub Divided Warren Truss Steel Railroad Bridge Built by Doc Hemp and Dave Moeller
(This Bridge Was The Brain Child Our Friend Melvin Harris)
This web page is about how we built this bridge ... It all starts after the first 5 photos. For more photos of the moving of the bridge visit Page #2 ... links to it are below the 5th photo and at the bottom of this page. The entire length of this bridge including approaches is about 100 feet.
Dave Moeller ... And they said it wouldn't work? ... After finishing this page see more at
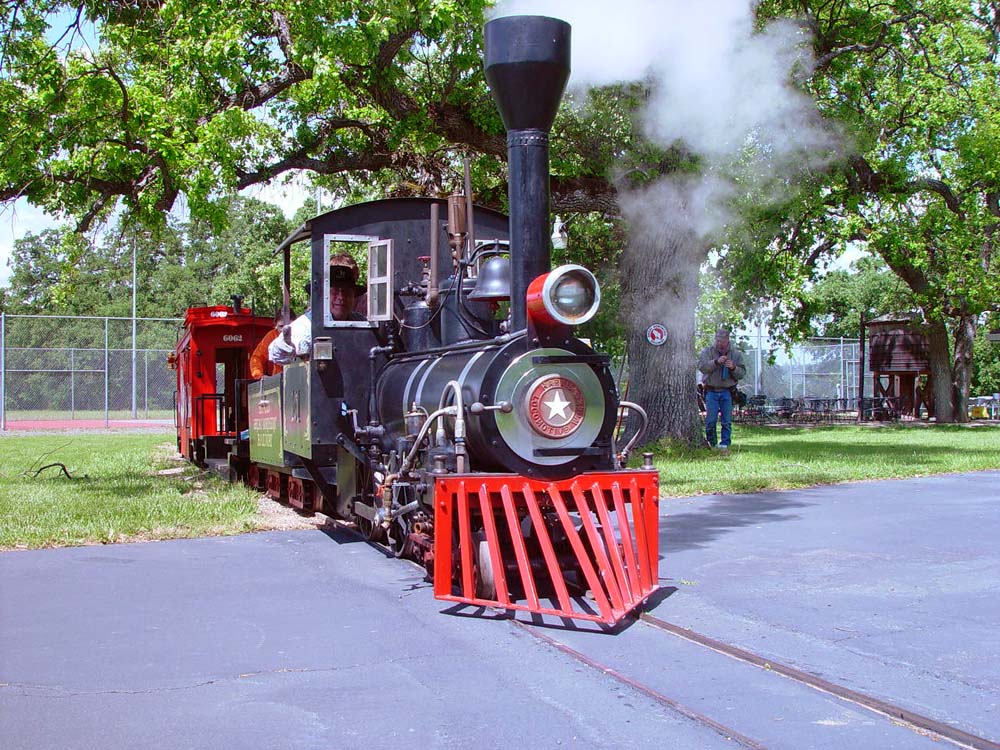
ZERO Deflection in the 3" crown we built into this all Steel Warren Truss Bridge. "Davey Boy" our electric & "Little Bubba" our steam engine and tender doing a double header .... With our long flat car attached we would have about an 80' train now.
This is our Steam Train we will be running over this bridge. The link to our Train Site is at the bottom of this page.
9/23/05 ... First of all this morning at 5 A.M. .... our daughter Kathy gave birth to our 3rd grandchild ... a bouncing baby girl ... 7.9lbs and 19.5" long .... Shelby Renee' Delker.
And this was also the day Dave Moeller and I finished our Warren Truss Steel Railroad Bridge ... We put the last bolt in in Gold (paint) ... a huge project but worth it! After 9 months of labor our baby was finished on 9/23/05 too!! (grin) .... I can now remember the date we finished this project because of Shelby's birthday!
Also without Melvin Harris giving me the confidence that I could build this bridge it would have never happened either ... Mel said that anyone that could curve and weld all that track could build a bridge! ... Mel started us out by skeching the side view of this bridge on his kitchen table. Dave Moeller then took it from there with the engineering. Dave is a mechanical engineer and is a retired Corporate President of Simpson Lumber Co. He oversaw the engineering and building of Simpson's Co-Generation Plant.
He has observed and followed all the welding and building of all the work on my engines, etc. at Melvins Harris Locomotive Works and of course my daily building of the bridge.
Melvin and I laid out and welded the 3" X 3/8" angle iron top and bottom rails of one side the first day. I then did all the welding the next 9 months it took to build the bridge after that. Over coffee in the morning Dave and I would exhange ideas, Dave also helped chop saw, move and clamp the larger pieces of cut steel where I couldn't use the tractor. The I beams I built were Dave's Idea .... the Warren Truss floor was mine ... I also decided on the 8' width instead of the original 6' because it didn't waste any material and I wanted to drive Big Blue over it. The side height and Warren Truss design on the sides were Melvin's .. and Dave & I designed the knee braces. Dave Designed the top beam clamp and bolt assembly for the wood walk way and helped me put all of them in too. These bolts allowed us to attach the walk way without any drilling in the steel which would have weakend it.
Our friend, neighbor and Mechanical Engineer Dave Moeller Without whom this project would not have happened Thank You Dave!!!
68 feet 5 inches long and 8 feet wide!
9/3/05 Update .... bolting the wood driving and walking areas onto the Bridge ... 1st photo ... shows our bolt pattern to hold the 2X12X16's onto the I beams ... Photos 2 and 3 show the first 4 bolts going in, counter sunk and bolted thru the clamps. It also shows the wood placed roughly where we are going to postition it. ... It is very hard to show the length and massiveness of the bridge with these photos ... walking it and viewing it in person shows the magnitude of this fun adventure. I will try a pic with Dave Moeller standing at the other end to put it into perspective ...
11/18/05 UPDATE! .... The bridge has been finished since 9/23/05 now ... Abutments finally finished today .... We did beat the winter rains! .... Had to wait for Brian Taylor ... our main man contractor to finish up with some of Ron Clark's (another dentist friend of mine in Dead Bluff CA.) ... endless entrepreneural enterprises! Just money making junk .... geeze .. he thinks he's going to take it with him when he croaks! ... ( grin) My hobby stuff is OBVIOUSLY much more important!!!
I dug out the abutment sites with my old trusty "Big Blue" tractor ... down to nearly solid rock ... we used 3/4 minus lime stone road base on top of that ... 6" layers compacted and watered down. .. Angle iron bolted in everywhere on railroad ties and 5/8th inch rebar drilled through all the joints and sledge hammered them 18" down into the old base rock .... We went way over kill on the abutments just as I did on the bridge ... but they will be there a hundred years from now! We are attatching the bridge on one side firmly and in slots on the other side that will allow for expansion/contraction.
Below are some photos of the abutments ... and after that are the old photos from when we started the project.
We also had Brian and Bill place many 5/8" rebar through all the railroad tie joints with my DENTAL DRILL and down 18" into the rocky ground besides the angle iron we used too.
Below I am keeping all the progress of the building of this Bridge
8/20/05 Update ... Bridge is nearly finished! ... (except for the 2x12 planks to be bolted on) ... Today I graded the route the next phase of track will take after crossing the bridge and we are starting on the bridge abutments next. I am leaving all the old updates so the progress of this project can be followed. I am estimating over 4 tons of steel and over 30lbs of 7018 welding rod in this bridge plus the weight of the wood.
Where the bridge will go and the track path on the other side
This is the land bridge return route ... 10' high on the ravine side ... we will connect just before our tunnel (train barn)
8/6/05 Update ..... Bridge is almost finished! .... In photo below see the green 15 1/8th gauge bars in place .... this keeps the gauge perfect for the welds to follow after our vacation ... these are painted green for all our straight track and red for our curves which are 15 3/8" wide . ... green go for straight and red slow for curves .... when these get mixed up it is very important to be able to identify easily the correct gauge of it would be a disaster!
I will be putting a pair of 2" X 12" X 16' long Douglas Fir on each side for driving the tractor over and as a walk way if we have to stop the train in the middle of the trestle some time. Dave Moeller found these really cool beam clamps you just move into place and line up with the hole in the wood and clamp down and run a 7" carriage bolt thru the hole in the clamp.
Below see one of our gauge bars close up
7/30/05 .. Update (this is also Arnold Schwartzenegger's Birthday) ... Happy Birthday Governor
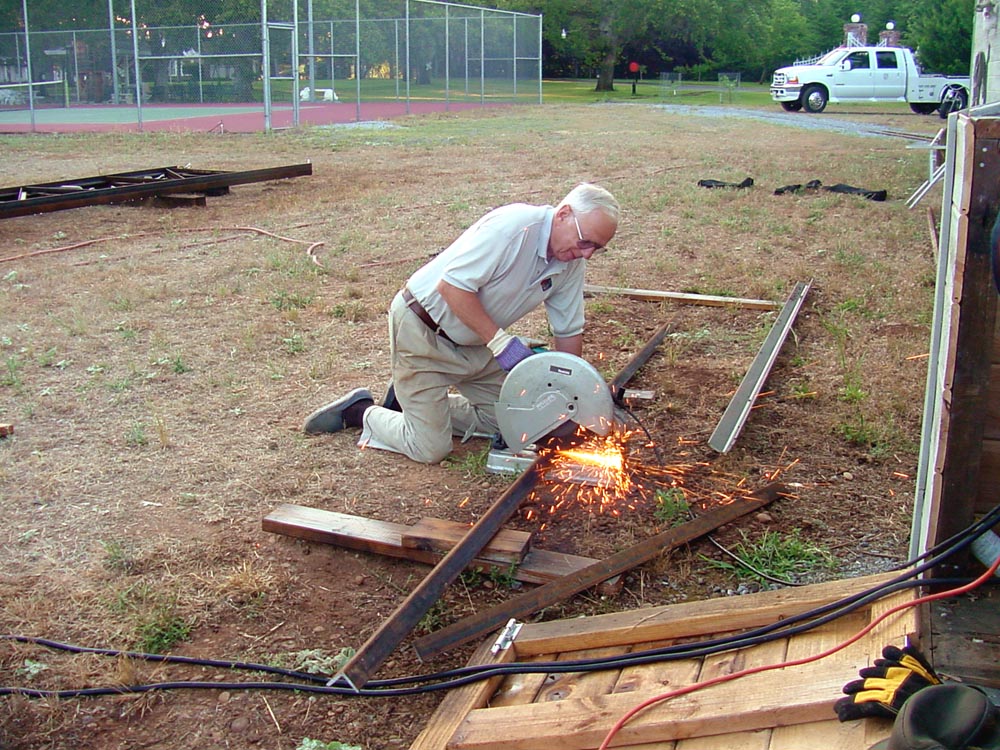
This morning I welded for an hour or so ... mostly the 10' long knee braces every 8' that go underneath and angle back up to the top rails for lateral support. Then when Dave Moeller came over we measured and cut 3" Channel (steel he helped unload yesterday) for the floor. I Couldn't have done this project without Dave's Help!!! We cut 1/3 of all the Warren Truss diagonals we need to do the entire floor of this Trestle this morning..... See Several photos below I took today ..... quit at 9:30 as usual because of the heat here in our area.
Day before yesterday 2 welders burnt a home down near here .... was 9:30 A.M. which is okay but they were putting decorative steel rail around a wooden deck ... some slag fell down between the boards and ignited the dry grass below ... If they had just wet down the deck and underneath at first ... and every so often as needed .... Everything would have been okay ... also the hose bib was below the deck and one fellow got burned quite badly trying to get to the hose after the fire had already ignited the deck. We can never be too careful guys! I always have a hose with a cut off nozzle ready to go and we wet things down first and afterwards too in case there is some sparks smoldering beneath a wood support, etc. plus ....We are in an open field with only stubble to ignite ... but with an afternoon wind sparks can be teased into flame and blown into an more ignitable area.
Warren Truss style floor too! Shown before the I beams have been added every 8 feet.
I will weld the 30' 12lb railroad track directly over this and at each 30' section we will bolt splices in to allow for expansion if needed
7/24/05 Update ..... I cut all the I Beam material that Dave designed and one of the 20' X 3" X 3/8th" Angle irons the last few days and welded up one more of the I Beams which were Dave's idea and are much much stronger. We used these every 8' on the bed of the trestle instead of the original idea of every 12'.
This is a shot of how I make the I Beams .... Then skip weld about every 4 - 6"
7/09/05 ..... Update .... today I got up at 5 A.M. as usual ... started welding the gusset plates at 5:45 .. had 10 left to finish the whole left side ... Dave Moeller (our neighbor mechanical engineer) who has really helped me on this came over just as I was finishing the last one .... Al Sebasian made the mistake of driving by and asking if we needed any help ... and since we were setting both sides up (they weigh about 1 1/2 tons or more each) we happily accommodated him (grin) .... I used "Big Blue" our tractor to pick both sides up of course. I spot welded 2" angel across the top to stablize both sides.
Dave Moeller on your left and Al Sebasian
Big Blue lifting the side up
8 Feet Wide!
We knotched the top of the 2X4's and set up the footings to support the side .... Al's Idea and It was Dave Moellers idea on how to do the inside supports ... I just drove the tractor today, knotched out the 2x4's and welded where necessary.
68 Feet Long!
A good shot of the gusset plates
7/03/2005 .... Update ... I finished the first side of the trestle this winter and spring by myself between storms .... A couple days ago we started using the finished side as a template and this 2nd side is blazing along! .... Especially with Dave Moellers help in measuring and cutting the angle iron and me spot welding that day. The 5 photos just below are medium file size to show more detail.
I have been starting at 5 A.M. again like last summer to beat the heat .... I have a large cup of Folgers coffee for Dave each morning when he comes over. We usually work till about 8:30 or 9:00 A.M. on weekends and till 7:30 on work days like I did last summer. Just too hot here and there is no shade where we are building the trestle. ... Damn I love building this stuff!!! It's hard to explain the raw pleasure of personally working with steel and bringing ideas to fruition.
Dave Moeller with the Makita chop saw .... Running off our 10K Bob Cat welder
We started on our Warren Truss Trestle Dec 3, 2004. All is structural A36 steel. The sides are 4' tall. The upper, side and lower rails are 3" X 3/8" angle iron. The spokes and centers are 2" X 1/4" angle iron. The floor is 8 feet wide with 3" X 1/4" Channel welded back to back to form 3" X 1/2" eye beams every 8 feet across with both track rails welded across over each one! ..plus 3" X 1/4" Channel on edge every 4' across with both rails welded to each one .. and 3" X 1/4" Channel on diagnal from each joint in each direction making the floor into a solid Warren Truss design too. We also have Knee Braces that are 10' X 2 1/2" X 1/4" angle iron coming the full lenght underneath every 8' and tying back up into the top of the 2" side rails for lateral support. The bottom rails are 3" X 3/8" X 68' 5" Angle Iron. And the upper rail is 3" X 3/8" X 60' angle iron with 3" X 3/8" Angle Iron tying the top and bottoms together. All 3 way junctions have 1' X 6" X 1/4" gussets welding all the angles together too. I also spot welded everything first with 6011 rod and finished everything with 7018 rod. You can see many of the spot welds on the early photos. We go ZERO WARPAGE!
Oh .... And last but not least ... The next time you are in a Wallmart ... look up at the infrastucture of the ceiling .... All Warren Trusses just like ours ... With huge spans and huge loads on them ... And in the Great Mall near San Jose ... They made all their T beams by welding 3 X 3/8" angle iron back to back with skip welds under the joints only and then bolted the spokes in so they can remove them and use them again if the configuration of the mall is changed. The bolts are not as strong as a weld but plenty strong enough. Melvin Called our attention to Wallmart's ceilings too before we started. Also ... almost all freeway overpasses have Warren Trusses across them under the concrete.
This was our first afternoon Dec 3 ... this photo is of the 4' left side ... Mel Harris his brother-in-law John, Dave Moeller and myself were the crew .. and of course Big Blue my tractor and Little Blue our welder. I am having Melvin the master welder help me weld the the 3" Angle top and bottom today to start the project off .. I will weld all the spokes and the 3" channel steel ties. The bottom Rail is 68' 5" long and the top rail is 60' long.
12/05/04 .... I worked a few hours today ... Dave Moeller came by .... I cut 6 or 7 spokes .. the chop saw works so much better than the portable power hack saw I gave to Melvin when we finished our first phase of track . ... We laid them all out them and did more measuring.
Today, Friday Dec 10th I worked alone and cut all the 2"channel spokes for the left side and placed them .. I will spot weld next nice day I have time to get to it and then solidly weld everything in place next . See the 1st 3 photos below.
This is a shot of where our trestle will cross over the ravine. We will return over a land fill bridge on the other side.
This is the view we have of Mt. Shasta taken 12/10/04 from a special view spot we stop at on our railroad for our passengers to enjoy .... We are spoiled with the beautiful surroundings we have here.
12/18/04 ... Today I had the good fortune to have John Parks .... welding
instructor at our local college, who is not only a commercial Certified
welder himself but certifies other welders help me with my welding skills.
I took the welding class
Saturday ... and Sunday we treated Parks and his family and friends to
steam train rides on our railroad. John Landed his large Helicopter in
our lower field .. What a smooth pilot he is!
Parks Arcs 530-356-8910 Lic #814714 ... Specializing in portable welding
..... In the Redding CA area. http://parksarcs.com/
I realize that my couple thousand welds on my last 1000 feet of 12lb rail
with our steel welded ties doesn't qualify me to weld a structural train
bridge. John spent several hours with me on my welding of 6011 & 7018
rod. I do and did have my welder set up perfectly. But, I found I
was welding too fast ... thus my 2nd passes with the 6011 rod on the
track. But, even at high speeds with our train on corners, etc. ...
not a weld failure in 8 years. John also checked the welds on our 3"
angle that Melvin and I did last week.
Other than the 6 welds Melvin and I both did on the 3" angles
I did 100% of all the
other thousand or so welds in building our Warren Truss Bridge.
...
I will tack weld the left side of the trestle Wed & Thursday ... prolly with 6018 rod.